Double-sided labels are a great way to add value and extraordinary shelf appeal to high-end products like wine and spirits.
Double-sided labels are a label that, when applied to a bottle, can be seen through the bottle, and still contain the critical brand information on the consumer-facing backside. Many high-end wine and spirits brands depend on double-sided labels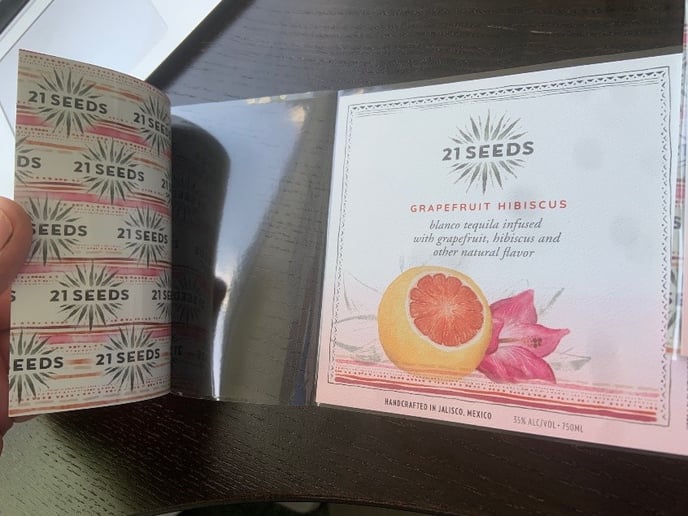 to provide depth to the artwork, to draw a shopper’s attention to their product, or to increase the real estate for branding or attention-grabbing graphics.
Brands love ‘em, but for many label producers, double-sided labels can double the amount of production time. The way many label converters are producing these jobs can be time consuming, labor intensive, and can tie up multiple pieces of machinery for a single job.
But it doesn’t have to be that difficult.
With a system from CDA, in partnership with S-One Labels & Packaging, the process is done in fewer steps making it easier to produce these standout labels right off an HP Indigo digital press.
Currently, many converters produce double-sided labels in a series of steps that look a bit like this:
-
-
-
- Start with a clear BOPP with clear adhesive.
- Reverse print the graphics that are intended to show through the bottle.
- Remove roll and move it to an offline laminating machine.
- Laminate to marry the clear BOPP to a white BOPP.
- Re-insert the roll back to the printing machine, and surface print the consumer facing graphics on the white BOPP.
- Remove the roll and move it to an offline laminating machine.
- Laminate to protect the ink.
-
-
Again, it doesn’t have to that difficult.
With the CDA system, you can print and laminate in one pass. What takes other converters twice as many steps, tying up twice as many machines, can be done in a fraction of the time.
In other words, what takes many converters seven steps, can be done in four.
-
-
-
- Start with a clear BOPP with a clear adhesive.
- Reverse print the graphics that are intended to show through the bottle.
- Laminate to marry the clear BOPP to a white BOPP.
- Re-insert the roll to surface print the consumer-facing graphics on the white BOPP, and laminate to protect the ink.
-
-
With a simple press modification, you can save time, save money, and free up equipment.
Reach out to your S-OneLP expert for more information. Contact us at labelsandpackaging@sone.com or 941-256-7900 (Americas) or +31 43 799 5005 (EMEA) to get started!